UIAlertController에서 UITextField 만들기 in Swift
UIAlertController
지난 글에서 UIAlertController에서 알럿을 띄웠습니다. 이번에는 알럿 창에서 글자를 입력받도록 하고자 합니다.
UIAlertController를 만들고 다음으로 아이디와 비밀번호를 입력받는 UIAlertAction를 만듭니다.
let alertController = UIAlertController(
    title: nil,
    message: "아이디와 비밀번호를 입력하세요.",
    preferredStyle: .Alert)

let loginAction = UIAlertAction(title: "Login", style: .Default) { (_) in
	let loginTextField		= alertController.textFields![0] as! UITextField
	let passwordTextField 	= alertController.textFields![1] as! UITextField

	login(loginTextField.text, passwordTextField.text)
}
loginAction.enabled = false
그리고 UIAlertController에 addTextFieldWithConfigurationHandler 함수를 호출하고 TextField에 기본값을 설정합니다. 또한, NSNotificationCenter을 통해 값을 입력받으면 loginAction이 활성화 될 수 있도록 합니다.
alertController.addTextFieldWithConfigurationHandler { (textField) in
    textField.placeholder = "Login"
    NSNotificationCenter.defaultCenter().addObserverForName(UITextFieldTextDidChangeNotification, object: textField, queue: NSOperationQueue.mainQueue()) { (notification) in
        println("(textField.text)")
        loginAction.enabled = textField.text != ""
    }
}

alertController.addTextFieldWithConfigurationHandler { (textField) in
    textField.placeholder = "Password"
    textField.secureTextEntry = true
}
forgotPasswordAction와 cancelAction를 추가하여 비밀번호를 찾거나 로그인 동작을 취소할 수 있도록 합니다.
let forgotPasswordAction = UIAlertAction(title: "Forgot Password", style: .Destructive, handler: nil)
let cancelAction = UIAlertAction(title: "Cancel", style: .Cancel, handler: nil)
마지막으로 각각의 UIAlertAction를 UIAlertController에 추가하고 UIAlertController를 띄웁니다.
alertController.addAction(loginAction)
alertController.addAction(forgotPasswordAction)
alertController.addAction(cancelAction)

self.presentViewController(
        alertController,
        animated: true,
        completion: nil)
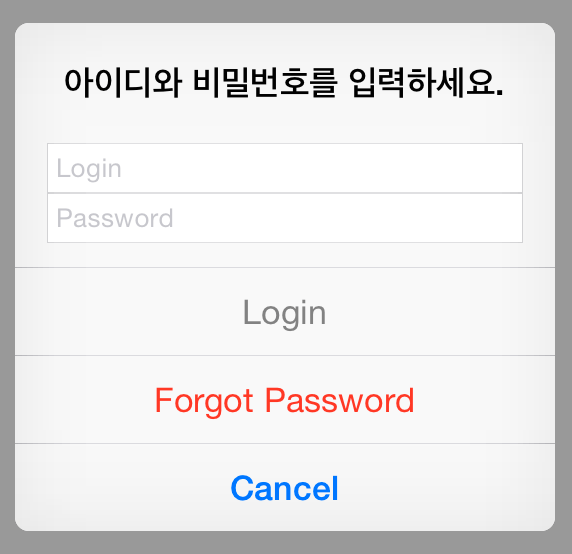
위의 코드를 통해서 다음과 같은 입력받을 수 있는 창을 띄울 수 있습니다.
참고 자료
Array